beautiful coffee maker instruction manual
- Published
- in Instructions
Welcome! This manual guides you through enjoying your new coffee maker, ensuring delightful brews. Discover features and safeguards for optimal performance, as detailed in the R-98010-IM-EN document.
What’s in the Box?
Carefully unpack your new coffee maker! Inside, you should find the main coffee maker unit itself, ensuring it’s free from any shipping materials. A glass carafe with a secure lid is included for brewing and serving your coffee. You’ll also receive a reusable filter basket – eliminating the need for paper filters initially. The instruction manual (like the R-98010-IM-EN PDF) is vital for setup and operation.
Please verify all components are present. If anything is missing, contact customer support immediately. Retain the original packaging for potential returns or warranty claims. Enjoy the journey to perfect coffee!
Important Safety Instructions
Read all instructions carefully before operating! To prevent electrical shock, never immerse the coffee maker, cord, or plug in water. Unplug from the outlet when not in use and before cleaning. Avoid touching hot surfaces; use handles or knobs. This appliance is not intended for use by persons with reduced physical, sensory, or mental capabilities;
Close supervision is necessary when used near children. Do not operate with a damaged cord or plug. Ensure the coffee maker is placed on a stable, heat-resistant surface. Follow these safeguards for safe operation, as outlined in the provided documentation.
Preparing for First Use
Initial setup is key! Thoroughly clean your coffee maker and run a water-only cycle to prime the system, ensuring a fresh, flavorful first brew experience.
Cleaning Before Initial Brew
Essential First Step: Before enjoying your first cup, a thorough cleaning is crucial. Remove any potential manufacturing residue that may affect the taste of your coffee. Begin by washing the carafe, lid, filter basket, and any removable parts with warm, soapy water. Rinse everything meticulously to ensure no soap remains.
Pay close attention to the water reservoir; wipe it clean with a damp cloth. This initial cleaning process guarantees a pure and flavorful coffee experience from the very beginning. It’s a simple step that significantly enhances the quality of your future brews, setting the stage for consistent enjoyment.
Priming the System: Water-Only Run
Preparing for Flavor: After the initial cleaning, ‘prime’ the system with a water-only brewing cycle. Fill the water reservoir to its maximum capacity with fresh, filtered water. Ensure the filter basket is empty – no coffee grounds are needed for this step. Initiate a full brewing cycle as if you were making coffee, but without any grounds present.
This process effectively flushes out any remaining manufacturing residue from the internal components, guaranteeing a pristine taste in your first actual brew. Discard the water after the cycle completes. This priming run is a vital step towards achieving optimal coffee flavor and machine performance.
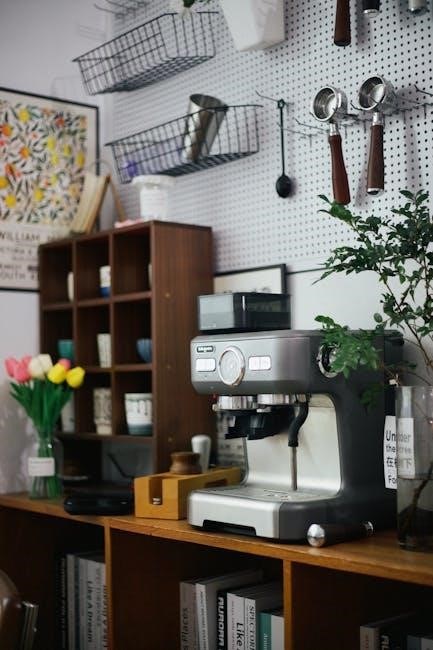
Understanding Your Coffee Maker’s Parts
Familiarize yourself! This section details each component – carafe, filter basket, water reservoir, and control panel – for seamless operation and maintenance of your appliance.
Carafe and Lid
Your carafe is designed for optimal heat retention, ensuring your brewed coffee stays warmer for longer. It’s crafted from durable glass, but handle with care to avoid breakage. The lid features a secure fit to prevent spills during pouring and helps maintain coffee temperature.
Always ensure the lid is properly aligned before brewing to prevent hot coffee from splashing. When cleaning, hand wash the carafe and lid with warm, soapy water. Avoid abrasive cleaners, as they may scratch the glass. Inspect regularly for any cracks or chips; a damaged carafe should be replaced immediately for safety.
Proper care extends the life of your carafe and ensures consistently enjoyable coffee experiences.
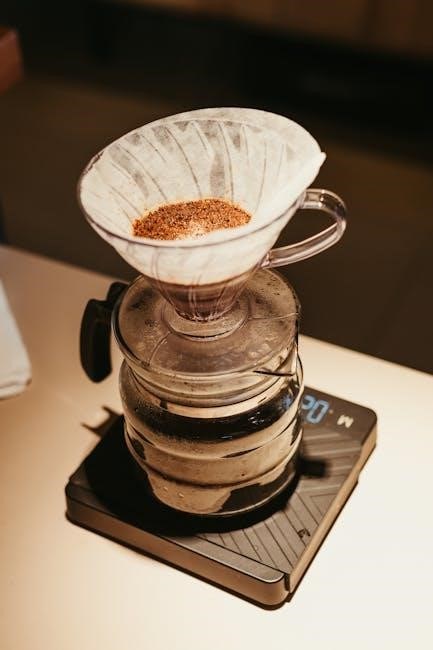
Filter Basket and Filter Type
The filter basket securely holds the coffee filter during the brewing process. It’s designed for easy removal and cleaning. This coffee maker is compatible with standard cone-shaped paper filters – check your local store for size #4. While reusable filters can be used, paper filters generally provide a cleaner brew, minimizing sediment in your coffee.
Ensure the filter is correctly seated in the basket before adding coffee grounds to prevent overflow. After each use, discard the used filter and rinse the basket thoroughly with warm water. Avoid using excessive force when cleaning to prevent damage.
Regular cleaning prevents coffee oils from building up and affecting the taste of future brews.
Water Reservoir
The water reservoir is located at the rear of the coffee maker and features clear level markings indicating cup quantities. Always fill the reservoir with fresh, cold, filtered water for the best tasting coffee. Avoid overfilling past the maximum line, as this could cause leakage during brewing.
Before each brewing cycle, check the water level to ensure you have enough for the desired number of cups. The reservoir is removable for easy filling and cleaning. Rinse it regularly with warm water to prevent mineral buildup.
Do not use hot water or other liquids in the reservoir, as this could damage the unit.
Control Panel Overview
The control panel features intuitive buttons for effortless operation. The power button initiates the brewing process, while the ‘Brew Strength’ selector allows you to customize your coffee’s intensity. A programmable timer button enables you to schedule brewing in advance, waking up to a fresh pot.
The ‘Auto Shut-Off’ indicator confirms the safety feature is active, turning off the coffee maker after a set period. An illuminated display shows the current time and programmed brewing start time. Refer to the ‘Advanced Features’ section for detailed timer instructions.
Familiarize yourself with each button’s function for a seamless coffee-making experience.
Brewing Coffee: A Step-by-Step Guide
Follow these simple steps to brew perfect coffee! Add water, grounds, select your desired strength, and initiate the cycle for a delightful experience.
Adding Water to the Reservoir
Carefully remove the water reservoir from the coffee maker. Locate the water level markings – these are clearly indicated on the reservoir itself, often displaying cup equivalents. Using a clean water source, pour in the desired amount of fresh, cold water.
Ensure you do not exceed the maximum fill line, as this could lead to overflow during the brewing process. For optimal flavor, filtered water is highly recommended. Once filled, securely re-attach the reservoir to the coffee maker base, confirming it’s properly seated to prevent leaks during operation. Proper water levels are crucial for a balanced brew.
Adding Coffee Grounds
Open the filter basket, ensuring it’s securely in place within the coffee maker. Insert a suitable filter – either a reusable mesh filter or a disposable paper filter, depending on your preference. Add the desired amount of ground coffee, typically one to two tablespoons per six ounces of water, adjusting to your taste.
For best results, use medium-ground coffee. Avoid overfilling the filter basket, as this can cause grounds to overflow during brewing. Gently level the coffee grounds for even saturation. Close the filter basket securely before proceeding to the next step, ensuring a proper seal for optimal brewing.
Selecting Brew Strength
Your coffee maker offers adjustable brew strength settings to customize your coffee’s flavor. Locate the brew strength selector button on the control panel – options typically include ‘Regular’ and ‘Bold’ or ‘Strong’. The ‘Regular’ setting delivers a balanced, classic coffee flavor, ideal for everyday enjoyment.
For a richer, more intense taste, select the ‘Bold’ or ‘Strong’ setting. This setting slows down the brewing process slightly, allowing for greater extraction of flavors from the coffee grounds. Experiment with both settings to discover your preferred brew strength and enjoy a perfectly tailored cup every time.
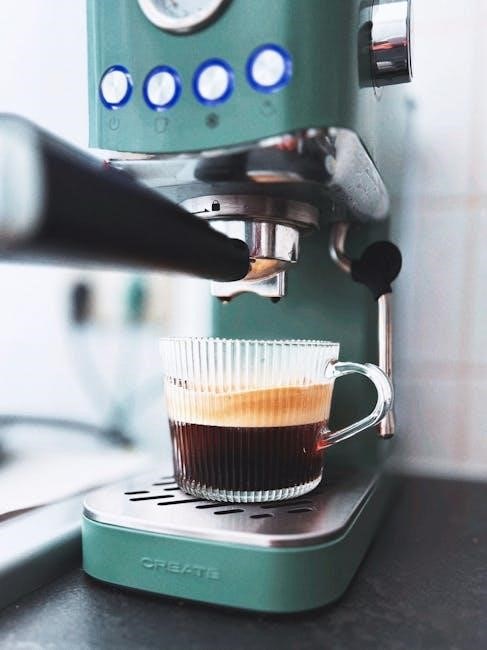
Starting the Brewing Cycle
Once the water reservoir is filled and coffee grounds are in place, ensure the carafe is securely positioned on the warming plate. Press the power button to initiate the brewing cycle. The indicator light will illuminate, signaling that the brewing process has begun.
Allow the coffee maker to complete the cycle uninterrupted. The brewing time will vary depending on the amount of water and selected brew strength. Once brewing is complete, the coffee maker will automatically switch to the ‘Keep Warm’ function, maintaining your coffee’s temperature for a set period.
Advanced Features & Settings
Explore programmable timers for automated brewing and utilize the automatic shut-off for safety. Enjoy consistently warm coffee with the convenient keep-warm function.
Programmable Timer Function
Wake up to freshly brewed coffee! This coffee maker boasts a convenient programmable timer, allowing you to schedule brewing up to 24 hours in advance. Simply set your desired brew time using the control panel, and the machine will automatically begin brewing at the specified hour. This feature is perfect for busy mornings or for those who enjoy a hot cup of coffee as soon as they rise. Ensure the water reservoir is filled and coffee grounds are in place before setting the timer. Refer to the control panel overview section for detailed instructions on programming the timer function. Enjoy the convenience of a perfectly timed brew, every time!
Automatic Shut-Off Feature
Safety and energy conservation are paramount! Your coffee maker is equipped with an automatic shut-off feature, providing peace of mind and preventing energy waste. After the brewing cycle is complete and the keep-warm function has elapsed (typically after two hours), the machine will automatically power down. This eliminates the risk of overheating and ensures safe operation, even if you accidentally forget to turn it off. This feature contributes to a safer kitchen environment and reduces electricity consumption. Always ensure the power cord is unplugged before cleaning or performing maintenance.
Keep Warm Function
Enjoy hot coffee, precisely when you want it! The integrated keep-warm function maintains your brewed coffee at an optimal serving temperature for up to two hours. Once brewing finishes, the coffee maker automatically switches to keep-warm mode, preventing it from becoming cold or stale. This feature is ideal for leisurely mornings or when entertaining guests. However, prolonged warming may slightly alter the coffee’s flavor profile. For the freshest taste, it’s recommended to consume the coffee within the keep-warm period. Remember the automatic shut-off will activate after this time.
Cleaning and Maintenance
Regular cleaning ensures longevity and optimal performance! Daily procedures, descaling, and carafe/filter basket cleaning are vital for consistently delicious coffee, as outlined here.
Daily Cleaning Procedures
Maintaining your coffee maker daily is crucial for preserving its performance and the quality of your brew. After each use, promptly discard used coffee grounds and the paper filter (if applicable). Thoroughly rinse the filter basket with warm, soapy water, ensuring all residue is removed. The carafe should also be washed with warm, soapy water, or placed in the dishwasher if it’s dishwasher-safe – check the product specifications.
Wipe down the exterior of the coffee maker with a damp cloth to remove any spills or splatters. Avoid using abrasive cleaners, as they can damage the finish. Regularly inspect the water reservoir for any mineral buildup and wipe clean as needed. Consistent daily cleaning prevents the accumulation of oils and residue, guaranteeing a fresh and flavorful coffee experience every time.
Descaling Your Coffee Maker
Over time, mineral deposits from water can accumulate inside your coffee maker, affecting its performance and coffee taste. Descaling removes these deposits. Fill the water reservoir with a descaling solution (following the solution’s instructions) or a mixture of equal parts white vinegar and water. Run a full brewing cycle without coffee grounds.
Repeat this process with fresh water two to three times to thoroughly rinse away any remaining descaling solution or vinegar. Regular descaling – every 1-3 months, depending on water hardness – ensures optimal brewing temperature, extends the lifespan of your coffee maker, and maintains the rich flavor of your coffee.
Cleaning the Carafe and Filter Basket
After each use, promptly clean the carafe and filter basket to prevent coffee residue buildup. Wash both components with warm, soapy water. For stubborn stains in the carafe, a mixture of baking soda and water can be effective; let it sit before scrubbing gently. The filter basket can also be cleaned in the dishwasher if it’s dishwasher-safe – check your model’s specifications.
Ensure all soap residue is thoroughly rinsed away before reuse. Regular cleaning maintains hygiene and prevents off-flavors from affecting your next brew. A clean carafe and filter basket contribute significantly to the overall quality of your coffee experience.
Troubleshooting Common Issues
Facing problems? This section addresses typical concerns like the coffee maker not turning on, weak coffee, or leaks, offering quick solutions for a seamless experience.
Coffee Maker Won’t Turn On
Problem: Your beautiful coffee maker is unresponsive and fails to power on. First, verify the power cord is securely plugged into both the coffee maker and a functioning wall outlet. Test the outlet with another device to confirm it’s providing power.
Check the power switch; ensure it’s fully engaged. If using an extension cord, confirm it’s rated for the coffee maker’s wattage. A tripped circuit breaker could also be the culprit – reset the breaker in your electrical panel.
If these steps don’t resolve the issue, there might be an internal fault. Do not attempt to repair the coffee maker yourself; contact customer support for assistance, referencing your warranty information.
Coffee is Weak or Bitter
Weak Coffee: If your brew lacks strength, increase the amount of coffee grounds used per cup. Ensure you’re using freshly ground beans for optimal flavor extraction. A coarser grind might also be necessary, as fine grounds can lead to under-extraction. Verify the water reservoir is filled to the appropriate level for your desired brew strength.
Bitter Coffee: Bitter taste often indicates over-extraction. Try using a coarser grind size or reducing the brewing time. Using too much coffee grounds can also cause bitterness; adjust the coffee-to-water ratio. Regularly cleaning your coffee maker, especially descaling, prevents residue buildup that contributes to a bitter taste.
Water Leaking from the Coffee Maker
Possible Causes: Water leakage can stem from several issues. First, ensure the water reservoir is correctly seated and not overfilled. Check the carafe is properly positioned on the warming plate; misalignment can cause spills. Inspect the filter basket for correct filter placement and avoid overfilling with grounds, which can obstruct water flow.
Troubleshooting Steps: Examine the connections between the reservoir, brewing chamber, and carafe for any cracks or damage. If leakage persists, descale the coffee maker to remove mineral buildup that might be blocking internal pathways. If problems continue, discontinue use and contact customer support.
Warranty Information
Coverage & Claims: This coffee maker is covered by a limited warranty against manufacturing defects. Contact customer service for details and claim procedures, ensuring proof of purchase.
Coverage Details
Our commitment to quality extends to a comprehensive warranty protecting your investment. This warranty covers defects in materials and workmanship under normal household use, for a period of one year from the original purchase date. It does not cover damage resulting from misuse, accidents, unauthorized repairs, or normal wear and tear.
Specifically, the warranty addresses issues like malfunctioning heating elements, faulty control panels, and defects in the carafe or reservoir. We reserve the right to repair or replace the defective product, at our discretion. Proof of purchase, such as a dated sales receipt, is required to validate any warranty claim. This warranty provides peace of mind, ensuring your coffee experience remains consistently enjoyable.
How to Make a Claim
To initiate a warranty claim, please contact our customer support team via phone or email, providing your model number (R-98010-IM-EN), date of purchase, and a detailed description of the issue. You will be asked to submit a copy of your original purchase receipt as proof of purchase.
Our support team will then guide you through the necessary steps, which may include troubleshooting or arranging for the product to be returned for inspection. We will cover reasonable shipping costs for warranty-related returns. Once the claim is approved, we will either repair or replace the defective unit, as deemed appropriate.

Frequently Asked Questions (FAQ)
Common questions are addressed here! Explore answers regarding filter usage and optimal coffee choices to enhance your brewing experience with this beautiful machine.
Can I use paper filters?
Filter Compatibility Explained: While this beautiful coffee maker is designed to function optimally with reusable filters, the use of standard paper filters is generally permissible. However, it’s crucial to ensure the paper filters are the correct size and shape to fit securely within the filter basket.
Improperly fitted filters can lead to grounds escaping into your brewed coffee, resulting in a less enjoyable experience. Always double-check the filter’s placement before initiating the brewing cycle. Using the recommended reusable filter will consistently deliver the best flavor extraction and minimize waste, aligning with a sustainable lifestyle. Experiment to find what works best for your preferences!
What type of coffee is best?
Coffee Selection Guidance: The “best” coffee truly depends on your personal taste! However, a medium-ground coffee generally works exceptionally well with this beautiful coffee maker, providing a balanced and flavorful brew. Experimenting with different roasts – light, medium, or dark – will reveal your preferred intensity.
For a richer, bolder experience, consider a dark roast. If you prefer a brighter, more nuanced flavor, a light or medium roast might be ideal. Freshly ground beans are always recommended for optimal aroma and taste. Explore single-origin coffees or blends to discover unique flavor profiles and elevate your coffee ritual!