Dikang Thermometer Instructions: A Comprehensive Guide
Due to temporary server limitations, detailed instructions are currently unavailable; please revisit later for a complete guide to your Dikang thermometer.
Understanding Your Dikang Thermometer
Your Dikang thermometer is a precision medical device designed for fast and accurate temperature readings. It’s crucial to understand its core functionality before use. Currently, due to website resource limitations, accessing detailed specifications is temporarily unavailable. However, generally, Dikang thermometers utilize infrared technology or traditional thermistor sensors to detect body temperature.
Different models cater to various measurement sites – oral, rectal, axillary, and tympanic (ear). Familiarize yourself with the specific type you possess. The device’s accuracy relies on proper usage and calibration, which will be detailed in forthcoming sections once server capacity is restored. Understanding these basics ensures reliable temperature monitoring for you and your family.
Types of Dikang Thermometers Available
Dikang offers a range of thermometers to suit diverse needs, though current website constraints limit detailed model specifics. Generally, you’ll find oral thermometers designed for mouth readings, providing convenience and ease of use. Rectal thermometers, known for accuracy, are often preferred for infants and young children.
Axillary (armpit) thermometers offer a non-invasive option, while tympanic (ear) thermometers provide rapid readings. Some advanced Dikang models feature multi-functionality, combining different measurement methods. Due to temporary resource limitations, a comprehensive catalog isn’t presently accessible. However, each type is engineered for reliable performance, and detailed instructions for each will be provided as soon as the website is fully operational.
Key Features of Dikang Digital Thermometers
Dikang digital thermometers are engineered with user-friendliness and precision in mind, though detailed specifications are temporarily unavailable. Core features typically include rapid measurement times, delivering results within seconds for quick assessments. High-accuracy sensors ensure reliable temperature readings, crucial for informed health decisions.
Many models boast a clear, easy-to-read LCD display, enhancing visibility. Memory functions allow storing previous readings for tracking trends, and a switchable Fahrenheit/Celsius option caters to user preference. Due to current website limitations, a complete feature list per model isn’t accessible. However, Dikang prioritizes quality and dependable performance in all its digital thermometer offerings.
Getting Started: Initial Setup
Currently, due to resource constraints, initial setup guidance is limited; please check back soon for detailed instructions on battery insertion and device activation.
Inserting Batteries Correctly
Ensuring proper battery installation is crucial for accurate temperature readings with your Dikang thermometer. Locate the battery compartment, typically found on the back or bottom of the device. Gently slide off the battery cover – avoid using excessive force.
Insert the batteries, paying close attention to the polarity markings (+ and -) inside the compartment. Incorrect polarity can damage the thermometer and void any warranty. Usually, Dikang thermometers require button cell batteries (like CR2032) or AAA batteries.
Confirm the batteries are securely seated and then replace the battery cover, ensuring it clicks into place. If the cover doesn’t close properly, double-check the battery orientation. A loose battery connection can lead to inaccurate readings or a non-functional device.
Powering On and Initial Self-Test
To activate your Dikang thermometer, locate the power button – usually labeled “ON/OFF” or a similar symbol. Press and release the button; a brief press is sufficient. Upon powering on, the thermometer will initiate a self-test sequence. This diagnostic check ensures all internal components are functioning correctly.
During the self-test, you’ll observe all display segments illuminating briefly. This confirms the LCD screen is operational. The thermometer may also display a version number or a specific code indicating successful initialization.
If any segments are missing or the thermometer displays an error message during the self-test, consult the troubleshooting section of this guide. A failed self-test suggests a potential malfunction requiring attention before use.
Understanding the Display Symbols
The Dikang thermometer’s display utilizes several symbols to convey information clearly. A battery symbol indicates remaining power; a low battery warning prompts replacement. A degree symbol (°C or °F) denotes the temperature unit selected. A “HOLD” indicator signifies the current reading is being held on the screen for review.
Some models feature a “Memory” symbol, showing readings are stored. A flashing symbol often indicates the thermometer is actively measuring. Error codes, displayed as “Err” or specific numbers, signal potential issues – refer to the troubleshooting guide.
Familiarizing yourself with these symbols ensures accurate interpretation of readings and proper operation of your Dikang thermometer. Consult the device’s specific manual for a complete symbol glossary.

Taking a Temperature Reading
Ensure proper placement for accurate results; oral, rectal, axillary, or tympanic methods are available depending on your Dikang thermometer model.
Oral Temperature Measurement
For accurate oral readings with your Dikang thermometer, ensure the mouth is free from food or drink for at least fifteen minutes prior to measurement. Gently place the thermometer probe under the tongue, towards the back of the mouth, and close your lips securely around it.
Avoid biting down on the probe, as this can damage the device and affect the reading. Hold the thermometer in place until it beeps, indicating the reading is complete – typically around 60 seconds, but consult your specific model’s instructions.
Remove the thermometer and carefully read the displayed temperature. Remember that recent eating, drinking, or smoking can influence the result, potentially leading to a falsely low reading. This method is generally not recommended for young children or individuals who are unable to hold the thermometer securely in place.
Rectal Temperature Measurement
Rectal temperature measurement, while highly accurate, requires careful execution with your Dikang thermometer. Apply a water-soluble lubricant to the thermometer tip before gently inserting it approximately ½ to 1 inch into the rectum.
Hold the thermometer securely in place, ensuring it remains positioned correctly throughout the measurement process. Do not release the thermometer until it beeps, signaling the completion of the reading – usually around 60 seconds, but verify your model’s specific guidelines.
This method is particularly useful for infants and young children. Always exercise extreme caution and gentleness. Clean the thermometer thoroughly with soap and water after each use. Rectal temperatures are typically 0.5 to 1 degree Fahrenheit higher than oral temperatures.
Axillary (Armpit) Temperature Measurement
Axillary temperature measurement, using your Dikang thermometer, is a non-invasive method, though generally less accurate than oral or rectal readings. Ensure the armpit is dry before beginning. Place the thermometer high in the armpit, ensuring direct skin contact with the sensor.
Firmly close the arm against the body to maintain the thermometer’s position throughout the measurement. Hold the arm securely for at least five minutes, or until the thermometer beeps, indicating completion.
This method is suitable for all ages but may require longer measurement times. Add 0.5 to 1 degree Fahrenheit to the reading to approximate oral temperature. Clean the thermometer thoroughly after each use with mild soap and water.
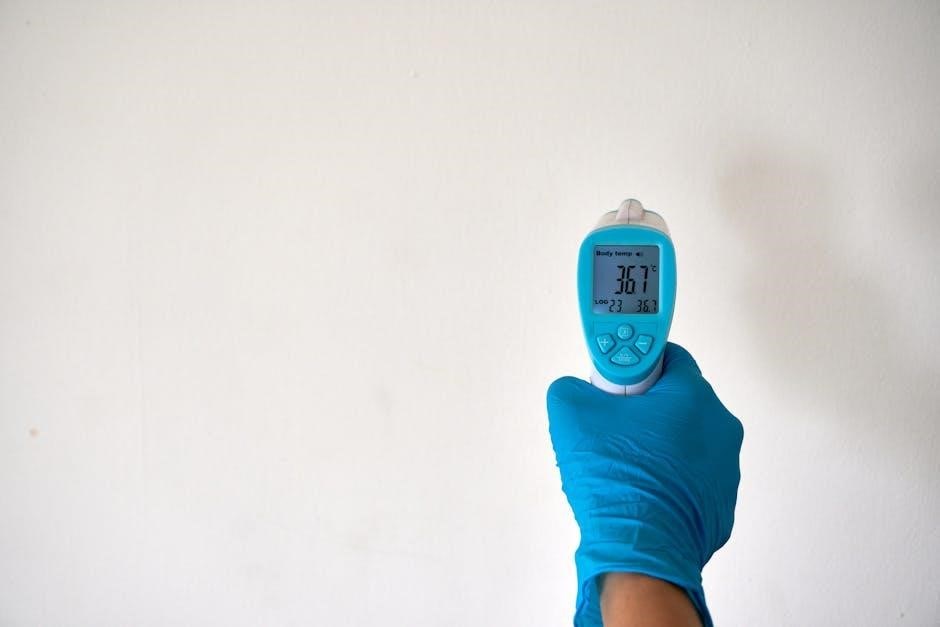
Ear (Tympanic) Temperature Measurement – If Applicable
If your Dikang thermometer features tympanic (ear) measurement, ensure proper technique for accurate results. Gently pull the ear upward and backward (adults) or downward and backward (children) to straighten the ear canal.
Insert the thermometer probe gently into the ear canal, ensuring a secure but comfortable fit. Press the measurement button and hold still until the thermometer beeps, typically within one second.
Avoid using this method if you have excessive earwax, an ear infection, or have recently been swimming. Clean the probe after each use with an alcohol wipe. Readings may vary; consult your doctor for interpretation.
Interpreting Temperature Readings
Understanding your temperature is crucial; normal ranges vary slightly. Elevated temperatures indicate a potential fever, requiring careful monitoring and possible medical attention.
Normal Body Temperature Ranges
Establishing a baseline understanding of normal body temperature is essential for accurate interpretation of readings obtained with your Dikang thermometer. While often cited as 98.6°F (37°C), normal body temperature can actually vary between 97°F (36.1°C) and 99°F (37.2°C). Several factors influence this range, including time of day – temperatures are typically lower in the morning and higher in the late afternoon – and activity level.
Measurement method also plays a role. Oral temperatures tend to be slightly lower than rectal temperatures, while axillary (armpit) temperatures are generally the least accurate. Understanding these nuances is vital when assessing a reading. A slight deviation from your personal baseline doesn’t automatically indicate illness, but significant or persistent changes warrant further investigation. Consistent monitoring helps establish your individual normal range.
Fever Indicators and What They Mean
A fever, indicated by an elevated body temperature, signals your body’s response to an illness or infection. Generally, a temperature of 100.4°F (38°C) or higher is considered a fever when measured orally. Rectal temperatures 0.5°F (0.3°C) higher may also indicate a fever. The severity of a fever can offer clues about the underlying cause.
Low-grade fevers (100.4°F ౼ 101.3°F) often accompany minor viral infections. Moderate fevers (101.4°F ー 102.2°F) may suggest a more significant infection. High fevers (above 102.2°F) require prompt medical attention, especially in infants and individuals with underlying health conditions. However, fever alone isn’t always a cause for alarm; consider accompanying symptoms and overall well-being when evaluating a reading.
Understanding Temperature Variations
Body temperature naturally fluctuates throughout the day, typically lowest in the early morning and highest in the late afternoon or evening. Factors like physical activity, stress, and even food intake can temporarily elevate temperature. Hormonal changes in women, particularly during the menstrual cycle, can also cause variations.
Measurement site impacts readings; rectal temperatures are generally higher than oral, and oral higher than axillary (armpit). Ensure consistent measurement location for accurate comparisons. Individual baseline temperatures differ; knowing your normal range is crucial. A slight elevation might be significant for someone with a typically low temperature, while a similar reading might be normal for another. Consider these factors when interpreting readings from your Dikang thermometer.
Dikang Thermometer Specific Functions
Explore advanced features like memory recall for tracking trends, easy Fahrenheit/Celsius conversion, and a convenient backlight for improved visibility in low-light conditions.
Memory Recall – Storing Previous Readings
Your Dikang thermometer is equipped with a memory function, allowing you to store and recall previous temperature readings for effective health monitoring. To access stored readings, typically you’ll need to press a dedicated “Memory” or “Recall” button on the device. The most recent readings are usually displayed first, and you can cycle through them using the same button.
The number of readings stored varies depending on the specific Dikang model, but most can hold up to 30-60 readings. This feature is incredibly useful for tracking fever progression, monitoring the effectiveness of medication, or simply observing temperature patterns over time. Regularly reviewing these stored values can provide valuable insights into your health or that of a family member, aiding in informed decision-making regarding medical care. Remember to consult the specific model’s manual for detailed instructions.
Fahrenheit/Celsius Conversion
Dikang digital thermometers often provide the flexibility to switch between Fahrenheit (°F) and Celsius (°C) scales, catering to user preference and regional standards. This conversion is usually achieved through a dedicated button, often labeled “°F/°C” or “Unit,” located on the thermometer’s body.
Pressing this button typically toggles the display between the two scales. Some models might require holding the button down for a few seconds to initiate the conversion. Understanding which scale your thermometer is currently set to is crucial for accurate interpretation of readings. Ensure you are familiar with the appropriate normal temperature ranges for both Fahrenheit and Celsius to correctly assess a fever or other health concerns. Refer to your specific model’s manual for precise instructions on performing this conversion.
Backlight Functionality
Many Dikang digital thermometers incorporate a backlight feature, enhancing visibility in low-light conditions. This is particularly useful for taking temperatures during the night or in dimly lit rooms, minimizing disturbance to the person being measured. Activation is typically achieved by pressing a dedicated “Light” or “Backlight” button on the device.
The backlight usually remains illuminated for a predetermined duration, often several seconds, before automatically turning off to conserve battery life. Some models may offer adjustable brightness levels. Utilizing the backlight ensures accurate reading acquisition without straining your eyes. Always check your thermometer’s manual for specific instructions regarding backlight operation and any available customization options for optimal use.
Care and Maintenance
Regular cleaning and proper storage are vital for maintaining accuracy and extending the lifespan of your Dikang thermometer; follow guidelines carefully.
Cleaning Your Dikang Thermometer
Maintaining hygiene is crucial when using a Dikang thermometer, especially with multiple users. After each use, gently wipe the thermometer’s probe with a soft cloth lightly dampened with isopropyl alcohol (70% is recommended).
Avoid harsh chemicals, abrasive cleaners, or submerging the entire unit in liquid, as this can damage the internal components. Ensure the alcohol has completely evaporated before storing the thermometer.
For the display and casing, a slightly damp cloth is sufficient. Never use excessive moisture. Regular cleaning prevents the spread of germs and ensures accurate readings. Always inspect the probe for any visible damage before and after cleaning.
Proper Storage Guidelines
To prolong the life and ensure the accuracy of your Dikang thermometer, proper storage is essential. Always store the thermometer in a cool, dry place, away from direct sunlight and extreme temperatures. The included storage case, if provided, is ideal for protection.
Avoid storing the thermometer in humid environments like bathrooms, as moisture can damage the internal circuitry. Keep it out of reach of small children and pets.
Before storing, ensure the thermometer is clean and dry. Do not store with other electronic devices that may interfere with its operation. Proper storage maintains functionality and extends the thermometer’s lifespan.
Battery Replacement Procedures
When the display indicates low battery power, carefully replace the batteries. Locate the battery compartment, usually on the back or side of the thermometer. Use a small screwdriver to open the compartment cover. Remove the old batteries, noting the correct polarity (+ and -) markings inside the compartment.
Insert new batteries of the same type, ensuring correct alignment with the polarity symbols. Close the battery compartment cover securely. Dispose of used batteries responsibly, following local regulations. Incorrect battery insertion can damage the thermometer.
Always use high-quality batteries for optimal performance.
Troubleshooting Common Issues
If encountering problems, first check battery installation and ensure proper usage. Refer to the manual for error codes and solutions promptly.
Inaccurate Readings – Possible Causes
Several factors can contribute to inaccurate temperature readings with your Dikang thermometer. Improper placement is a frequent issue; ensure firm contact for oral, rectal, or axillary measurements.
Environmental factors, like extreme temperatures, can also affect results. Allow the thermometer to acclimate to room temperature before use. Low batteries significantly impact accuracy, so replace them regularly.
Furthermore, recent eating, drinking, or smoking can skew oral readings. For rectal measurements, ensure proper lubrication and gentle insertion. If inconsistencies persist, try a different measurement site to verify the reading.
Finally, confirm you’ve selected the correct temperature scale (Fahrenheit or Celsius) within the device settings.
Thermometer Not Powering On
If your Dikang thermometer fails to power on, the most common cause is depleted batteries. Begin by replacing the batteries with fresh ones, ensuring correct polarity as indicated in the battery compartment.
Verify the battery compartment cover is securely closed; a loose connection can prevent power-up. If new batteries don’t resolve the issue, inspect the battery contacts for corrosion or debris, gently cleaning them if necessary.
In rare cases, the power button itself may be faulty. Try pressing it firmly and repeatedly. If the problem persists after these steps, the thermometer may require professional repair or replacement.
Avoid prolonged storage without batteries, as this can potentially damage internal components.
Display Errors and What They Indicate
Dikang thermometers utilize display errors to signal potential issues. An “Err” message typically indicates a sensor malfunction or an out-of-range temperature reading – ensure proper probe placement. A low battery indicator (often a flashing battery symbol) necessitates immediate battery replacement for accurate results.
If the display shows “Lo,” the temperature is below the thermometer’s measurement range. Conversely, “Hi” signifies a temperature exceeding the upper limit. These errors suggest environmental factors or improper usage.
A consistently blank or garbled display, even with new batteries, points to internal electronic failure, requiring professional assessment or unit replacement. Refer to your model’s specific manual for a complete error code list.
Safety Precautions
Always handle with care, avoiding drops or submersion. Keep out of reach of children. Discontinue use if damaged, and consult a healthcare professional promptly.
General Safety Guidelines
Prioritize safety when utilizing your Dikang thermometer. This device is intended for personal, non-professional use only. Never use it for purposes other than intended temperature measurement. Avoid forceful insertion, especially during rectal measurements, to prevent injury.
Regularly inspect the thermometer for any signs of physical damage, such as cracks or broken components. Do not attempt to disassemble or repair the device yourself; this could compromise its accuracy and safety. Keep the thermometer clean to prevent the spread of germs – follow the cleaning instructions detailed in the ‘Care and Maintenance’ section.
Always supervise children when they are using or are near the thermometer. Incorrect use could lead to inaccurate readings or potential harm. Store the thermometer in a safe, dry place, away from extreme temperatures and direct sunlight.
When to Consult a Doctor
While your Dikang thermometer provides a useful temperature reading, it’s not a substitute for professional medical advice. Seek immediate medical attention if you experience a high fever (typically above 103°F or 39.4°C) accompanied by severe symptoms like stiff neck, confusion, difficulty breathing, or persistent vomiting.
Consult a doctor if a fever persists for more than three days, even if it’s not exceptionally high. Infants and young children with any fever should be evaluated by a healthcare professional promptly;
Don’t self-treat based solely on temperature readings. A doctor can accurately diagnose the cause of the fever and recommend appropriate treatment. Remember, temperature is just one indicator of health; consider other symptoms and your overall well-being.
Disposal of Batteries
Proper battery disposal is crucial for environmental safety and responsible waste management. Do not discard used batteries with regular household trash. Batteries contain potentially harmful materials that can contaminate soil and water sources.
Instead, locate a designated battery recycling drop-off point in your community. Many retailers, pharmacies, and local recycling centers offer battery recycling services. Check with your local waste management authority for specific guidelines.
When recycling, it’s helpful to tape the terminals of the batteries to prevent short-circuiting. This minimizes the risk of fire or leakage during transport. Always follow local regulations regarding battery disposal to protect our environment.